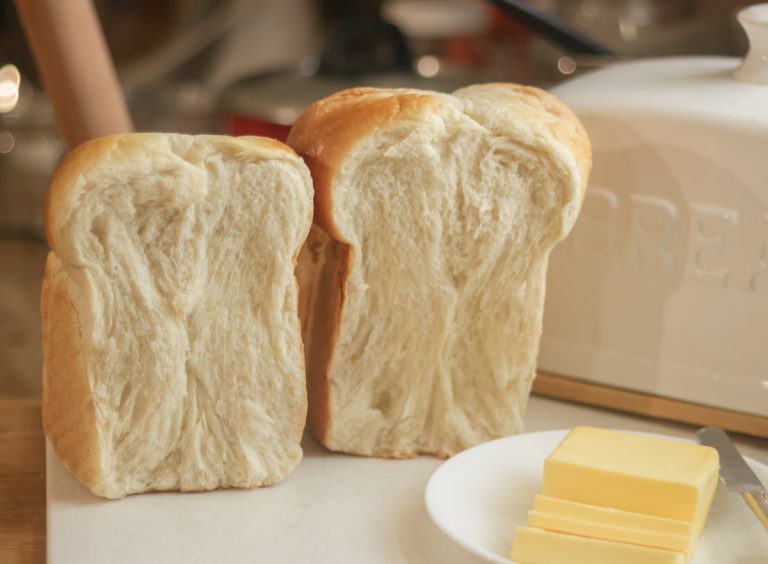
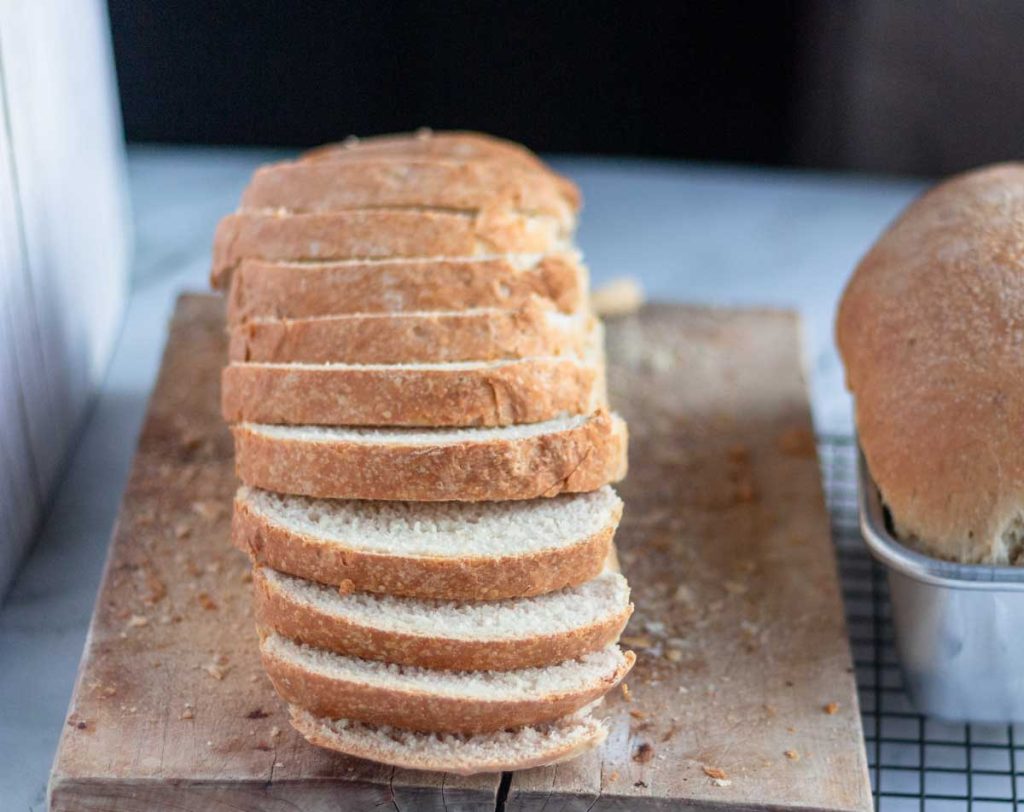
This easy sourdough sandwich bread is soft and fluffy, perfect for beginners. In addition, the recipe is also very economical as well, with no eggs or yeast. It’s made with all-purpose flour, sourdough starter, and some easy-to-find ingredients in your pantry.
Additionally, this homemade sandwich bread is very easy to make. No kneading or stretching and folding are required. You’ll simply add all the ingredients in a stand mixer, shape it, let it rise, and bake it. You’ll find it’s a no fuss recipe that everybody can make. I guarantee you will make this recipe over and over and over again. As a result of all of these wonderful traits, we love it and you will similarly too.
Since I learned to bake bread at home, I have never looked back. Moreover, I don’t miss the store-bought bread at all.
Because it’s easy to make, I make this sourdough sandwich bread weekly now, it’s my family’s second most requested sourdough bread because it tastes so good. In particular, it’s so crunchy and delicious but also because it is the easiest sourdough recipe. Not only that but keep in mind that you do not even have to use eggs or yeast which is great because the cost of eggs is increasing so much.
Why you’ll love this Sourdough Sandwich Bread
Unlike other breads, this recipe is very easy, simple, and good for beginners who have just started to learn sourdough making.
It’s a healthy alternative to store-bought bread. In the first place it is made with only a few ingredients, no chemicals or any strange name additives or preservatives that you cannot even pronounce or know what it is that you would be consuming. If you are conscientious like we are then that aspect really will bring you peace of mind.
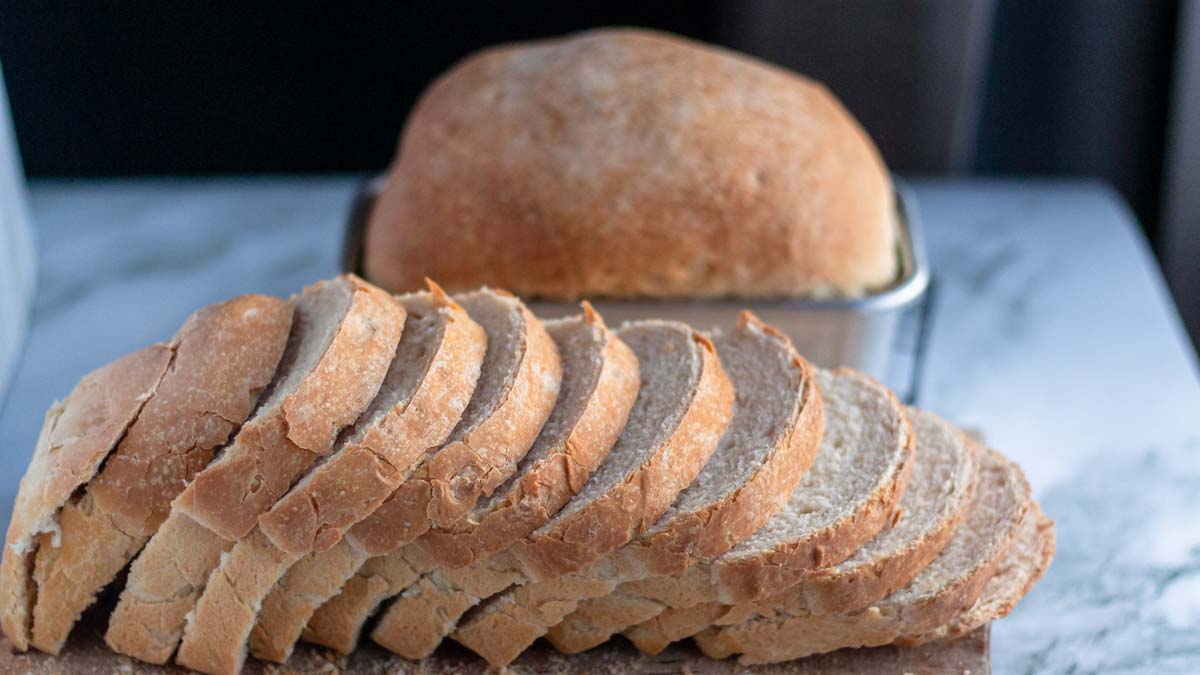
It’s very versatile. Although, you can eat this bread as the bread of your favorite sandwich; whether grilled cheese, bacon, egg, and cheese, sirloin steak, cream cheese and jelly, PB&J, it tastes good as just plain toast with butter. It’s full of flavor with a hint of tanginess.
Making homemade bread is economical, particularly this recipe, which doesn’t require eggs or yeast…
Simple Tips and Notes
For easy and hassle-free, use a stand mixer and let it do the kneading and mixing.
If you don’t have a mixer, you can also knead the dough by stretching and folding techniques.
Add milk powder if you want more texture.
You can use butter instead of coconut oil.
Use granulated sugar, raw sugar, or honey. This will give it a hint of sweetness. You may not use sugar if you prefer it.
Start checking the bread after 35 minutes because oven heating elements vary depending on many factors. Also, if you are using a cast iron or aluminum loaf pan.
Tools
Loaf Pan—You can use either cast iron or the standard aluminum loaf pan. Cast iron makes the bread have a crispier crust than a standard loaf pan.
Stand mixer
Measuring cups and spoons
Baking scale
Ingredients
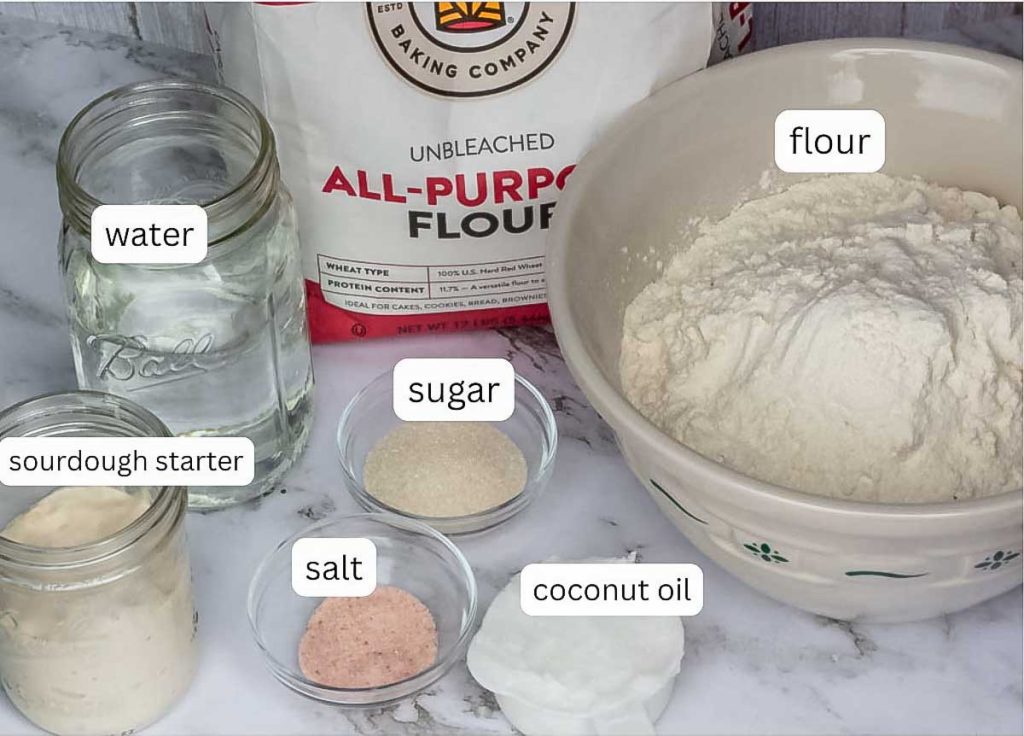
All-purpose flour- simple and easy to find. If you like a chewier texture then use all- purpose flour, otherwise you may opt for bread flour.
Coconut oil – gives a slight coconut flavor, resulting in a more moist and tender crumb. Soften the coconut oil before adding to the rest of the ingredients.
Active sourdough starter.
Water- Room temperature or whole milk if you want more flavor. This recipe is simple and only requires water.
Sugar- you can use granulated sugar, raw sugar, honey, or no sweetener at all; whatever you prefer.
Salt
Steps on how to make Sourdough Sandwich Bread
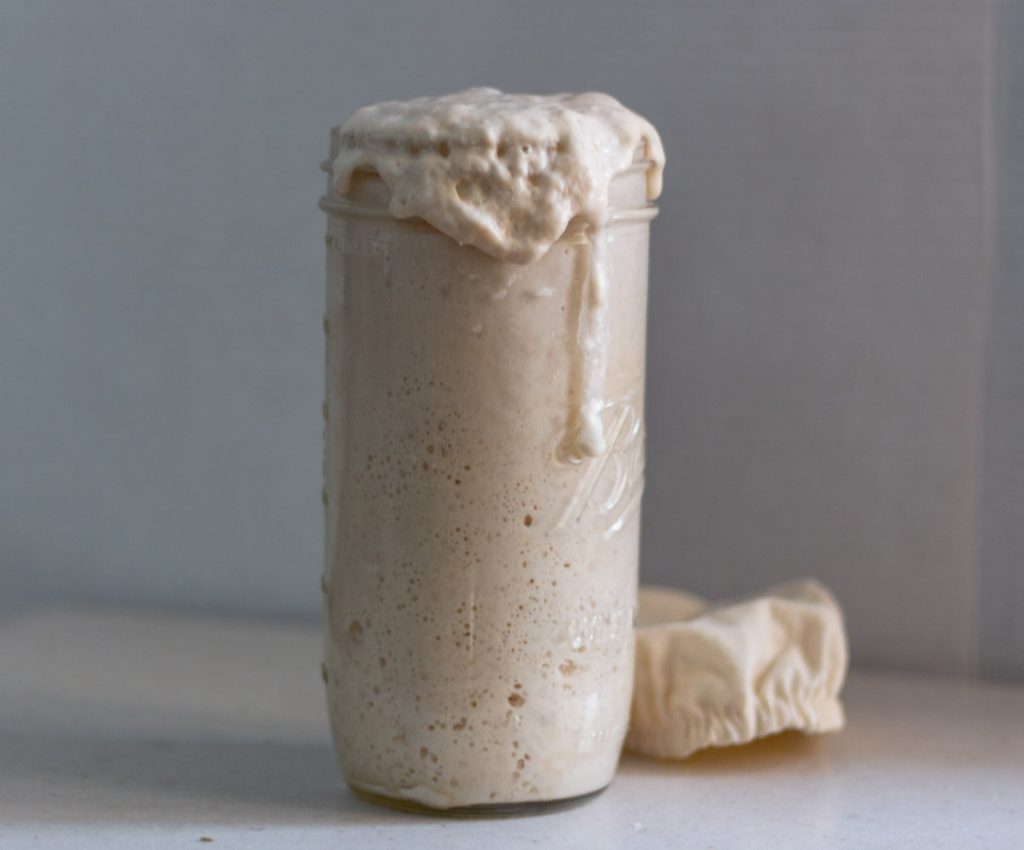
Feed the sourdough starter before bed or about 12 hours before you mix it with the rest of the ingredients. This recipe asks for an active, bubbly starter.
Mixing the dough
Add all the ingredients to a stand mixer bowl. ( 500 g all-purpose flour, 150 g sourdough starter, 250 g water, 60 g coconut oil or butter- softened, 3 Tbsp sugar, 5 g salt)
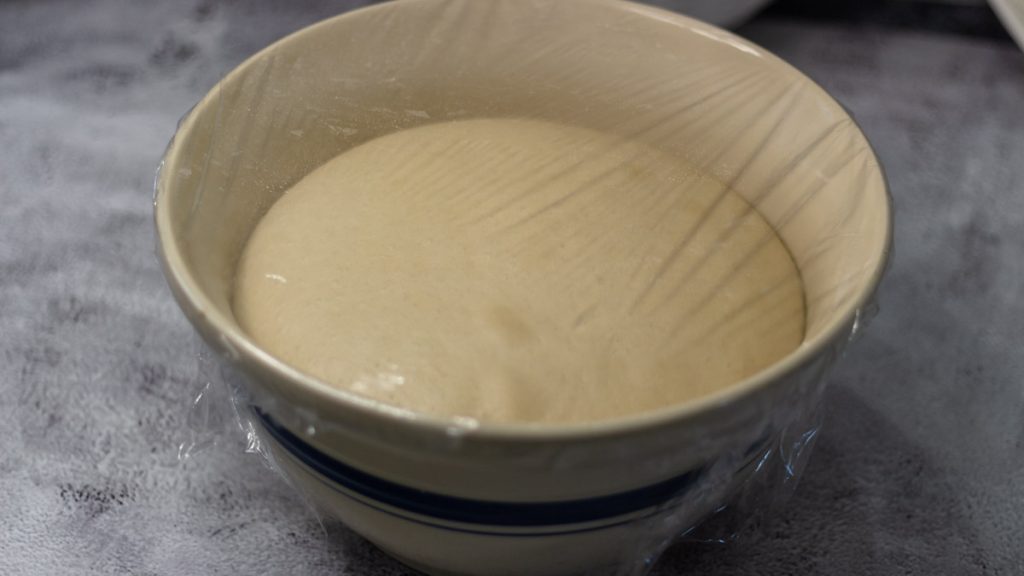
It will take 2 to 6 hours for the dough to double in size, depending on the temperature of the room and your starter. This is the first proofing. I prefer to cold-proof it in the refrigerator overnight for long fermentation. This will allow your bread to ferment at a slower rate and will give your bread more flavor. You can proceed to the next step if you prefer to bake this on the same day.
Shaping the dough
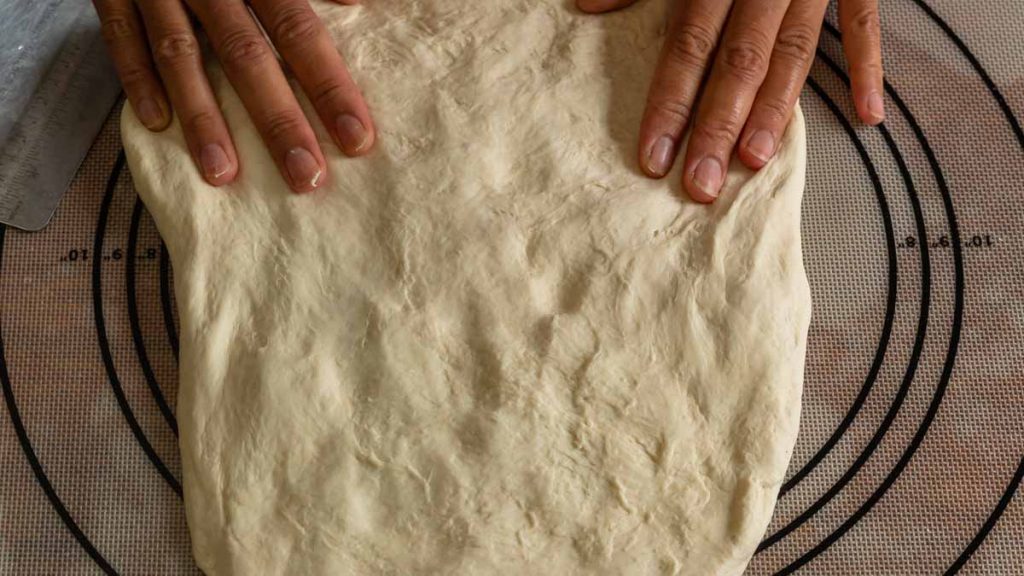
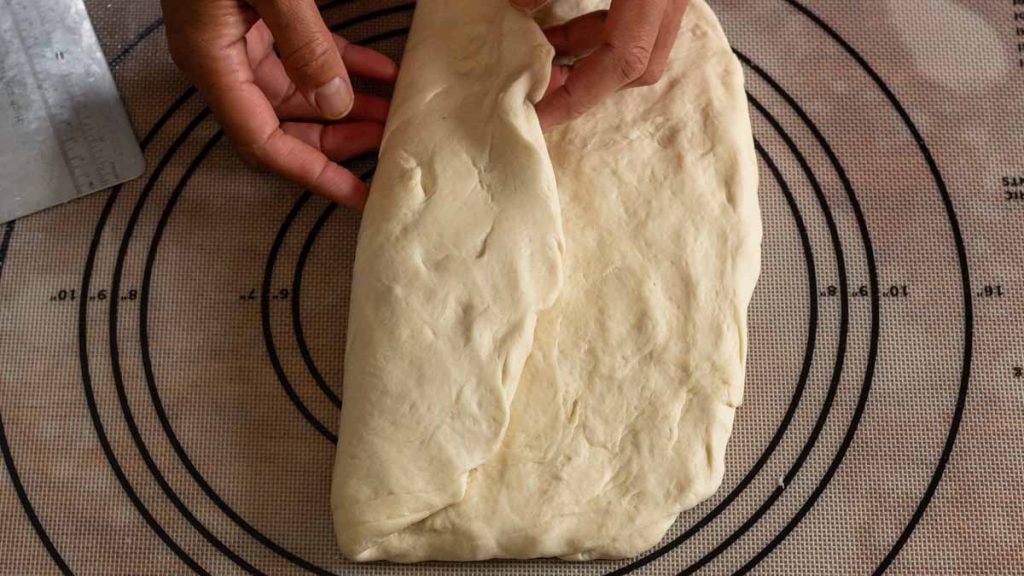
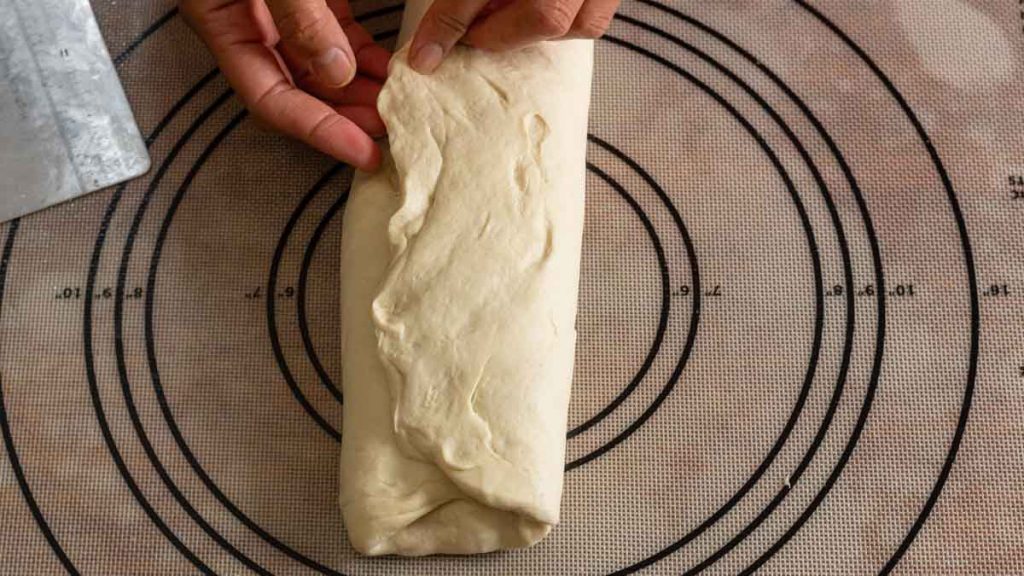
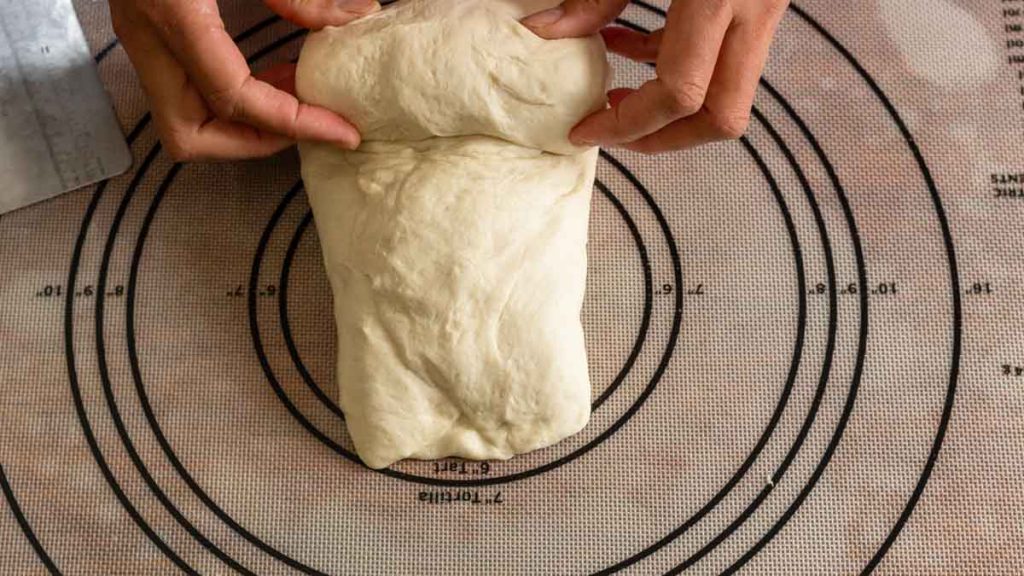
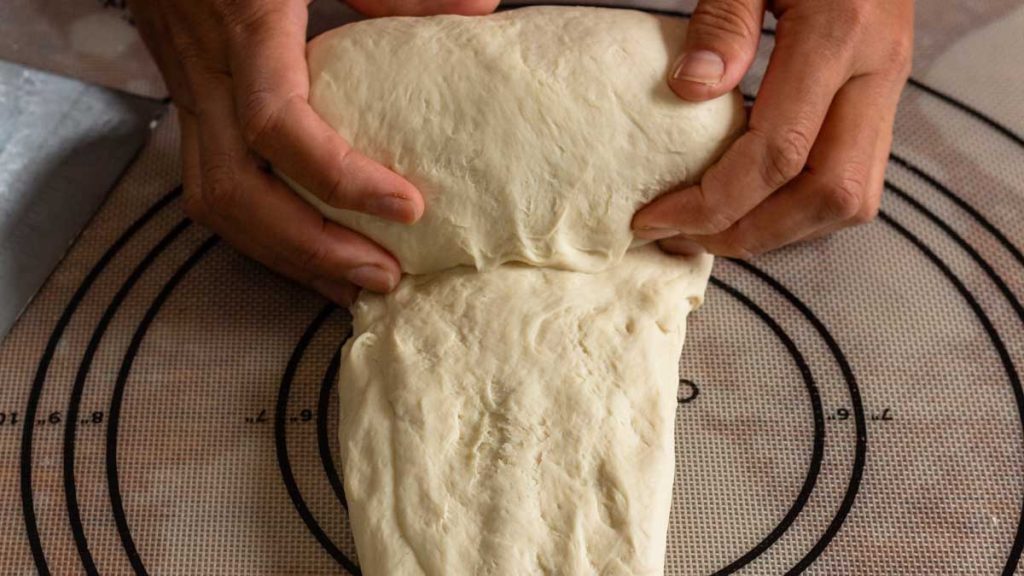
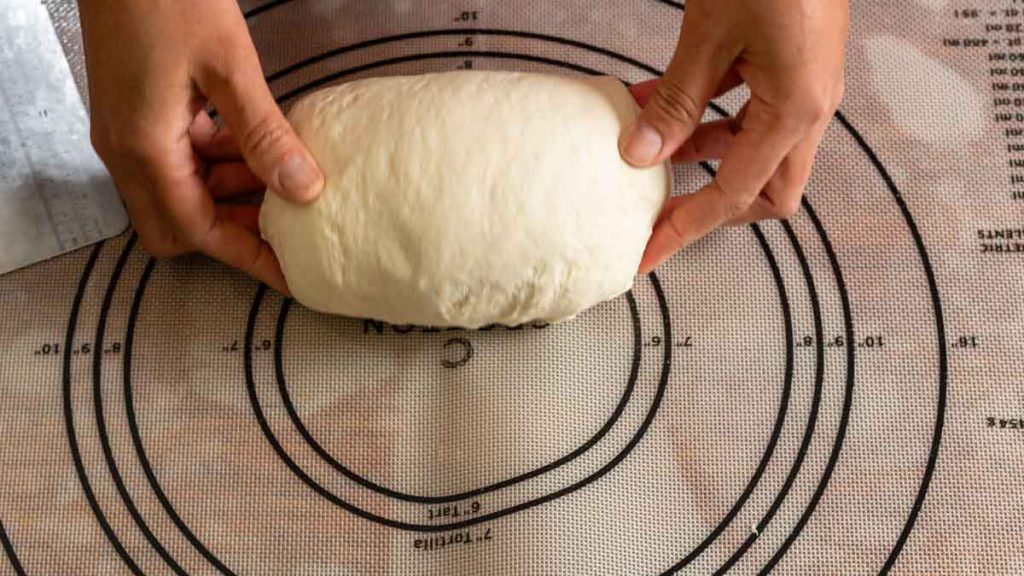
Shape it into a rectangle and roll the dough into a log to form a loaf. Steps pictured above. Make sure to press the edges, tucking the ends underneath. Place the seam side down in the loaf pan.
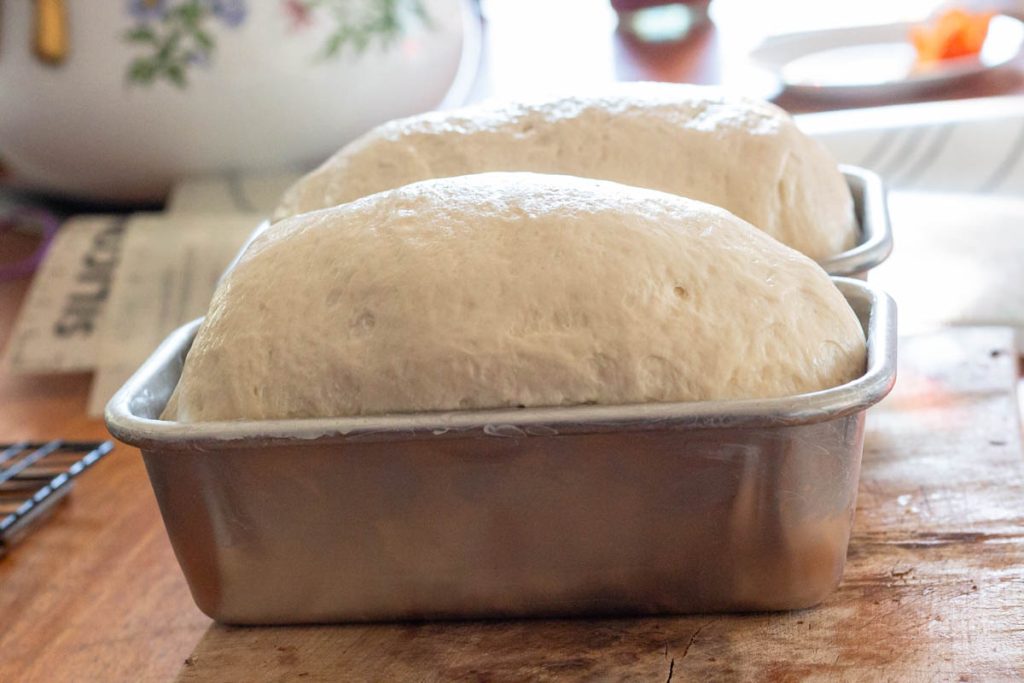
NOTE: This recipe is only good for one loaf pan. If you want, you can double the recipe to have two loaves. I doubled my recipe, hence the two loaves in the pictures.
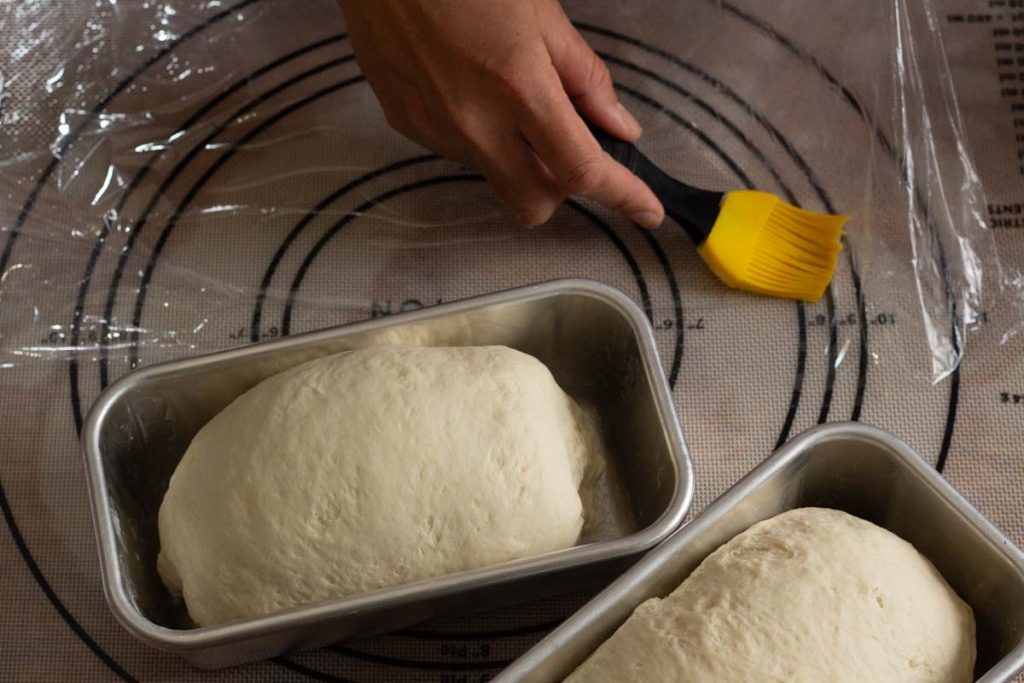
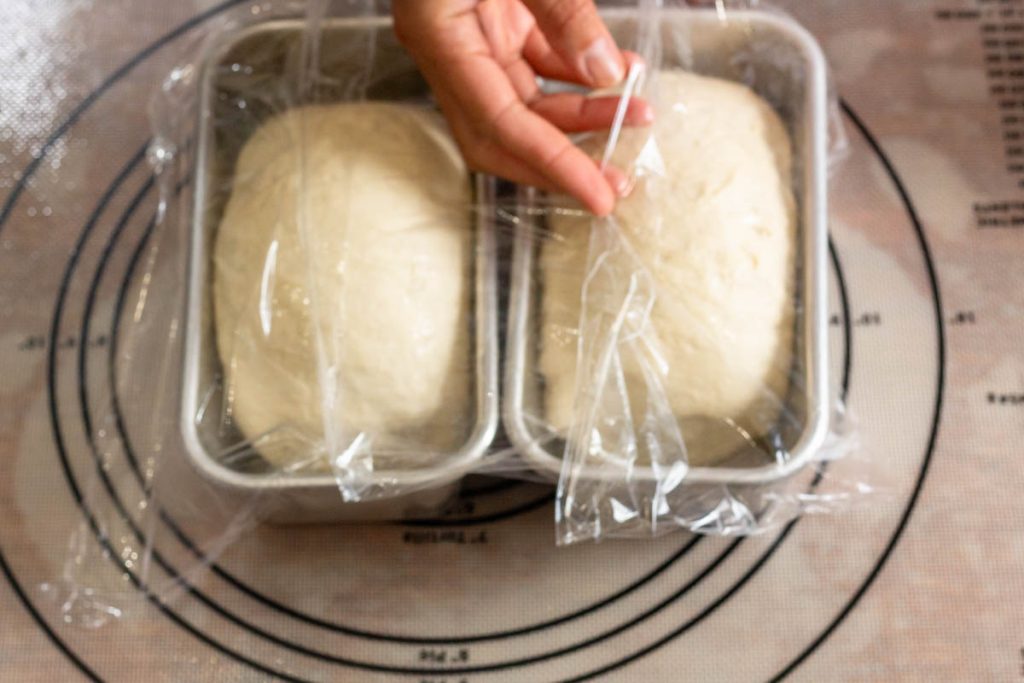
Cover the dough with oiled plastic wrap. Let it rest at room temperature until it has risen to about an inch above the rim of the loaf pan. This can take 4 to 5 hours. Note: The warmer the room, the faster the dough will rise. This is the final proofing.
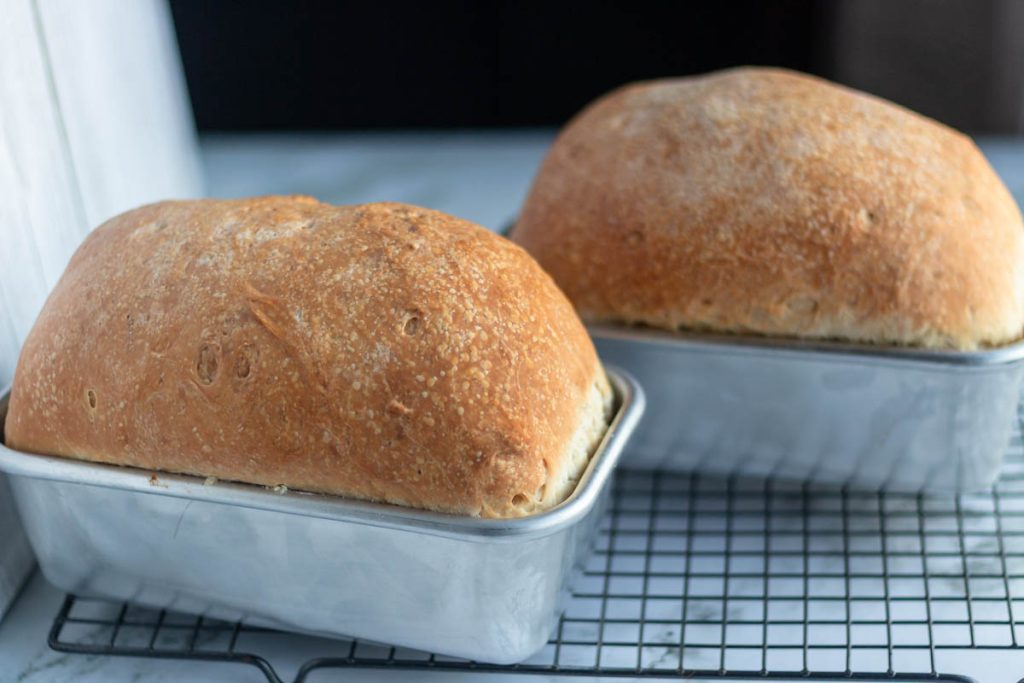
Preheat the oven to 375 deg. F. Optional, brush the dough with egg wash. Place the loaf pan in the middle rack. Bake for 40 to 50 minutes or until the top crust is golden brown.
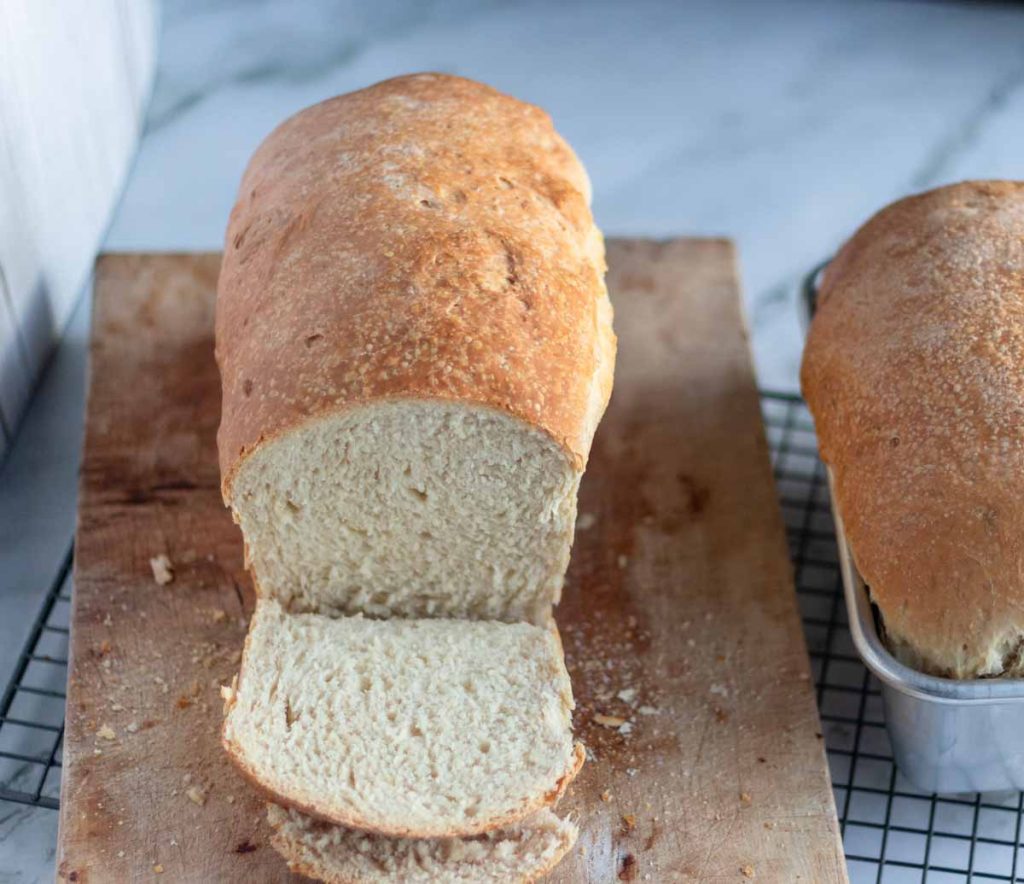
Remove the loaf from the oven and place it on a wire rack. Let it cool for about 5 minutes in the pan. Using an oven mitt, carefully remove the bread from the loaf pan and let it cool completely.
How to store leftovers
Make sure your bread is completely cool before storing it in an airtight container.
Wrapping the loaf in a paper bag will do.
You can also freeze the bread and store it in a freezer-safe container for 2-4 months.
If you made this recipe and love it, I would to hear back from you by leaving me a comment below and giving this recipe 5 stars!
Easy and Soft Sourdough Sandwich Bread Recipe
Ingredients
Equipment
Method
- Feed the sourdough starter before bed or about 12 hours before you mix it with the rest of the ingredients. This recipe asks for an active, bubbly starter.
- Add all the ingredients to the bowl of a stand mixer. (500 g all-purpose flour, 150 g sourdough starter, 250 g water, 60 g coconut oil or butter- softened, 3 Tbsp sugar, 5 g salt)
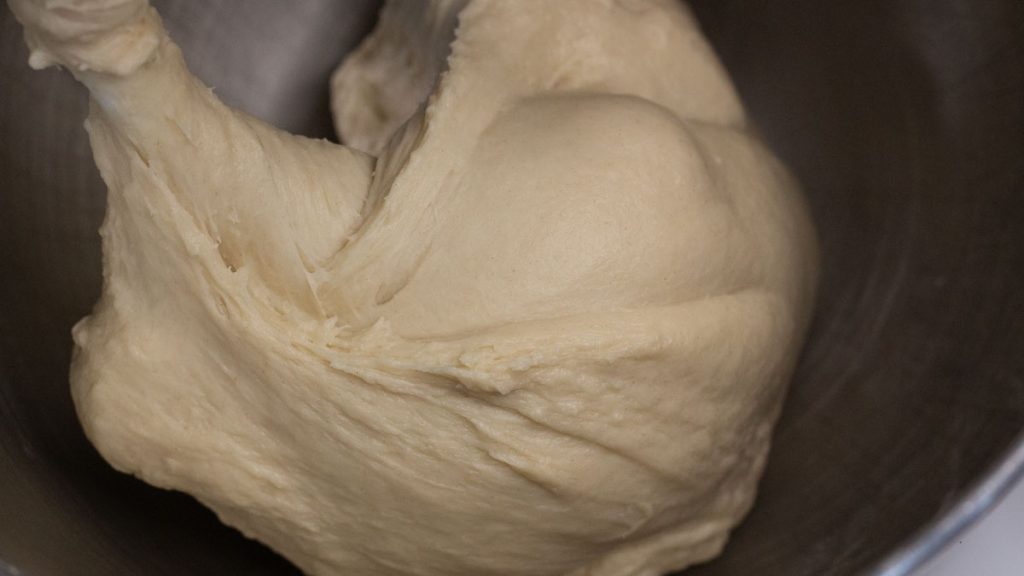
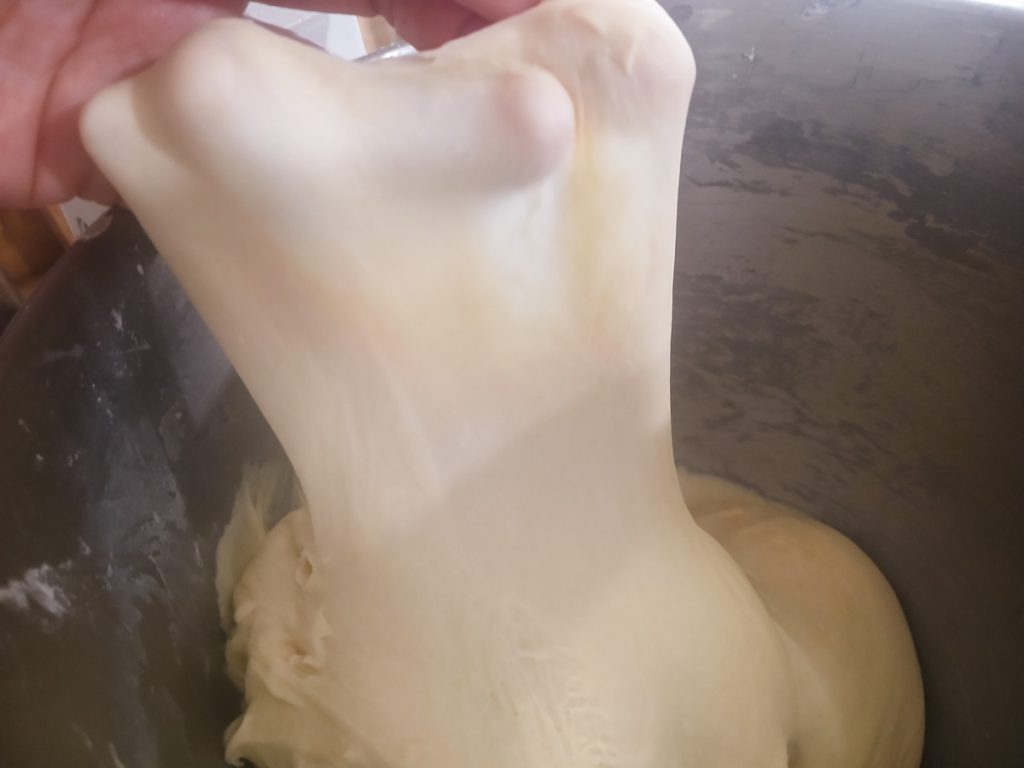
- With the dough hook on, start the mixer on low speed. Now, gradually add the flour to the mixing bowl. Then, turn the mixer to medium speed and mix for about another 10 to 15 minutes, or until the dough pulls away from the sides of the bowl. Perform the window pane stress test.
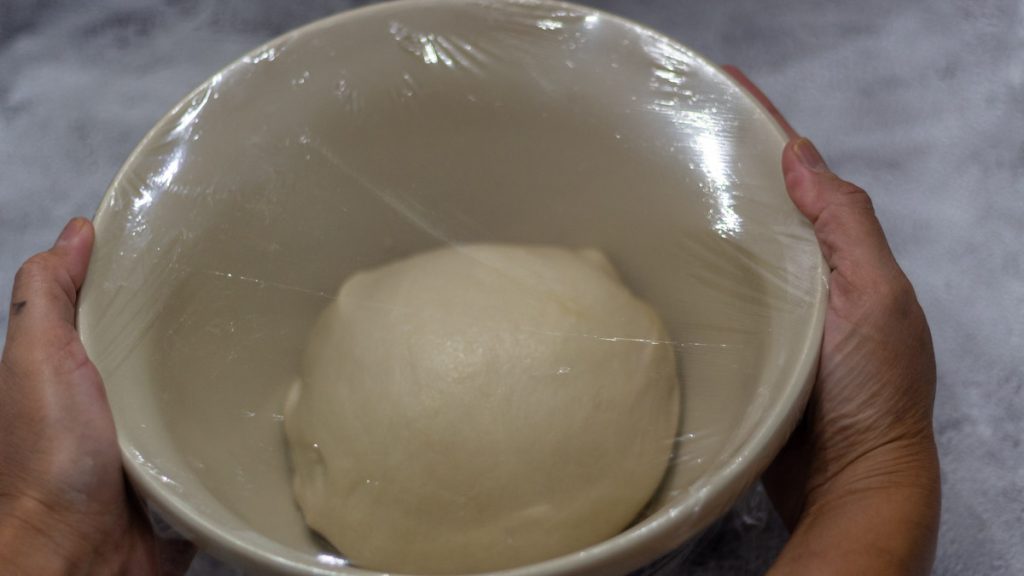
- Transfer the dough to an oiled bowl. Cover it with a plastic wrap or a tight lid to keep it from drying out. Place the bowl in a warm place to rise till it has about doubled in size.
- It will take 2 to 6 hours for the dough to double in size, depending on the temperature of the room and your starter. This is the first proofing. I prefer to cold-proof it in the refrigerator overnight for long fermentation. This will allow your bread to ferment at a slower rate and will give your bread more flavor. You can proceed to the next step if you prefer to bake this on the same day.
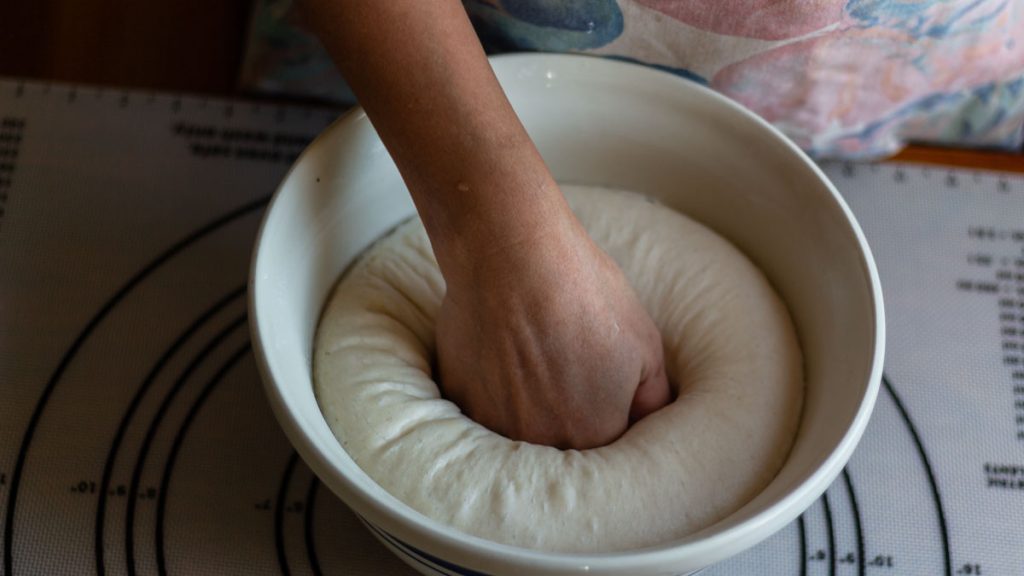
- Once the dough has doubled, grease the loaf pan or line it with parchment paper. On a lightly floured work surface, transfer the fermented dough.
- Shape it into a rectangle and roll the dough into a loaf. (Refer to the photos above).Make sure to press the edges, tucking the ends underneath.
- Place the seam side down in the loaf pan.
- Cover the dough with oiled plastic wrap. Let it rest at room temperature until it has risen to about an inch above the rim of the loaf pan. This can take 4 to 5 hours. Note: The warmer the room, the faster the dough will rise. This is the final proofing.
- Preheat the oven to 375 deg. F. Brush the dough with egg wash. Place the loaf pan on the middle rack. Bake for 40 to 50 minutes or until the top crust is golden brown.
- Remove the loaf from the oven and place it on a wire rack. Let it cool for about 5 minutes in the pan. Using an oven mitt, carefully remove the bread out of the loaf pan and let it cool down completely.